For the past several months the biggest issue we’ve been struggling with is finding a repeatable sales process for generating leads. I know, I’m sure everybody has tuned in right now and is waiting for the silver bullet which I’ve discovered! Sorry to disappoint, but there is no silver bullet. However, I think we've found a little silver nugget: a no-code way to build an automated lead generation machine!
From outsourcing to automation
In our never-ending pursuit to be innovative in our business, I’ve been trying to learn as much as possible. I picked up a Udemy course called Outsourced Lead Generation Machine. It sounded like a great way out of our predicament. After all, most of our team is comprised of Software Craftsmen, and boy, would we want to outsource our lead generation! Sure enough, it’s an excellent course, definitely worth the money. The course led me to the idea of automating, not merely outsourcing, our lead generation. We’re mostly still in the experimental stage of this effort, but we do have enough validated learning to share with you. So the little nugget of knowledge that I’d like to share today is our experience with automating our lead generation.
Define your customer profile
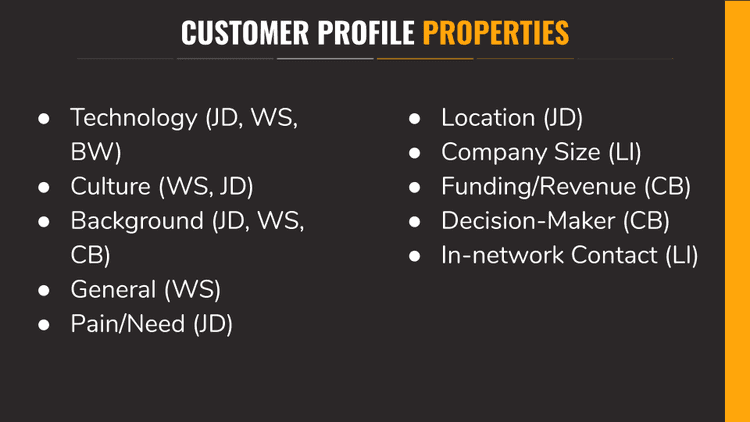
As I mentioned, the Udemy course is great. It has a lot of useful information and one of the first steps in the process is to build out the customer profile. The obvious reason is that you, as the salesperson, should know who you’re targeting. The customer profile is almost like a scorecard, which you can use to determine which customers are the closest match for your sales targeting needs. We did so in ST6 and here is our customer profile:
You’ll notice that we have some abbreviations in parentheses after each profile property. These are the abbreviations for the potential source of information for the lead. It’s going to be particularly helpful to know where to find this information if you’re going to automate the process.
In this case, the sources are:
- JD - Job Description
- WS - Website
- BW - Built With
- CB - CrunchBase
- LI - LinkedIn
In our initial iteration, we wanted to make sure that we identify companies that, at the very least, are looking for software developers. After all, our company is in the business of providing software craftsmanship services. Our hypothesis was that if the companies are listing open positions for software developers, then they might consider software development and consulting services. Naturally, that narrowed down what we were looking for job posts.
Define your problem
The Problem: At ST6 one of the biggest priorities is to identify and connect with companies, which are looking for remote software engineers. Aside from the standard networking and referral approaches, we decided to explore other ways to identify companies (leads) that might need our services.
The Solution: Scrape the internet for job listings that match the profile of our team. Build out a score that tells us which job is the closest match to our profile.
The initial information needed was:
- Technical/Skills
- Background
- Company Culture
- Company Profile
- Remote OK
Yeah, but how do we do that without writing code, you ask?
The solution: no-code MVP
Software development resources can be very expensive and should be used almost as a last resort. With that in mind, the first thing we wanted to do was build out an MVP which required as little coding as possible. Given that most salespeople are non-technical, it's also a good exercise to demonstrate that fairly complex automation can be done without a single line of code being written. Technically speaking, there are a few lines of code written, but they’re very basic and could be avoided with Airtable formulas. In fact, some of the Airtable formulas I wrote are more complex than the code written. Here is the most complicated code written and executed inside some of the Zapier tasks:
output = {
  pubDate: input.pubDate || new Date(),

  company: input.company && (input.company.split(' at ').pop() || ''),
};
OK, that’s all the code you’ll see in this blog post. Now let’s get back to the solution! Our tools of choice are:
- RSS.app, for generating RSS feeds from websites.
- Zapier, for automation: consuming RSS feeds and inserting the leads into Airtable.
- Airtable, for storing and organizing our leads.
As I mentioned earlier, we’ll have to find job posts and figure out which companies are posting them. After scouring the internet for the best job listing websites, we found an extensive list maintained in a Github repository. The list also shows which websites provide an RSS feed. Handy! However, RSS is not all that popular nowadays, so if a website doesn’t have an RSS feed, you’ll have to do some internet magic!
Use RSS generators
I tried several RSS feed generators and the one that worked best, aside from being the simplest, was RSS.app.
RSS.app allows you to turn this:
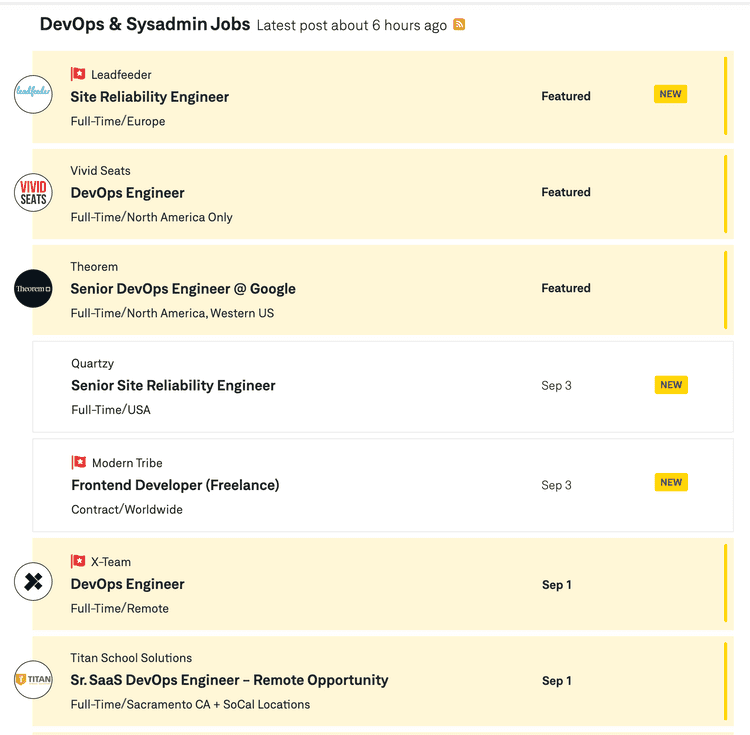
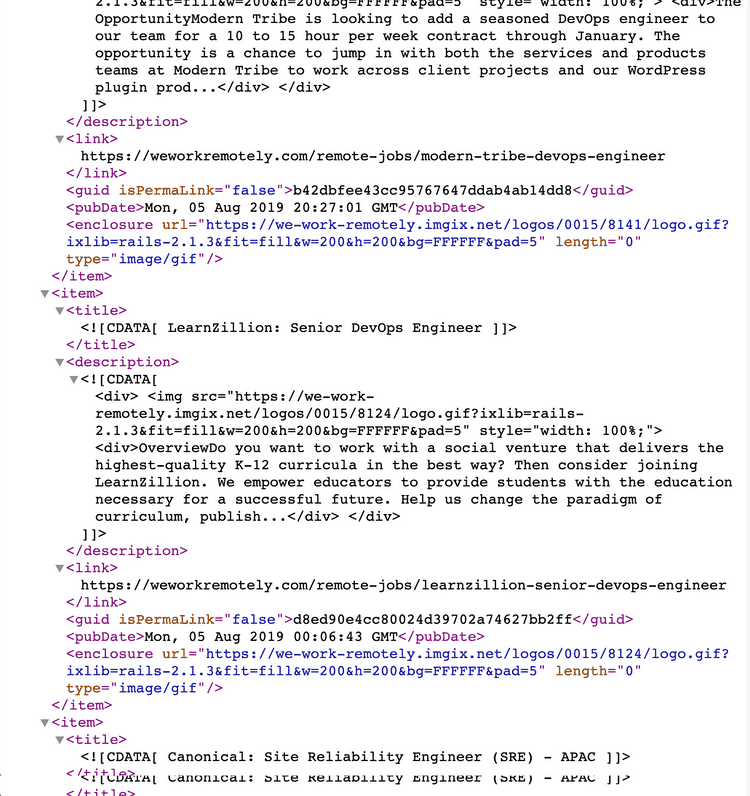
Into this:
You get all this with nothing more than the click of a few buttons:
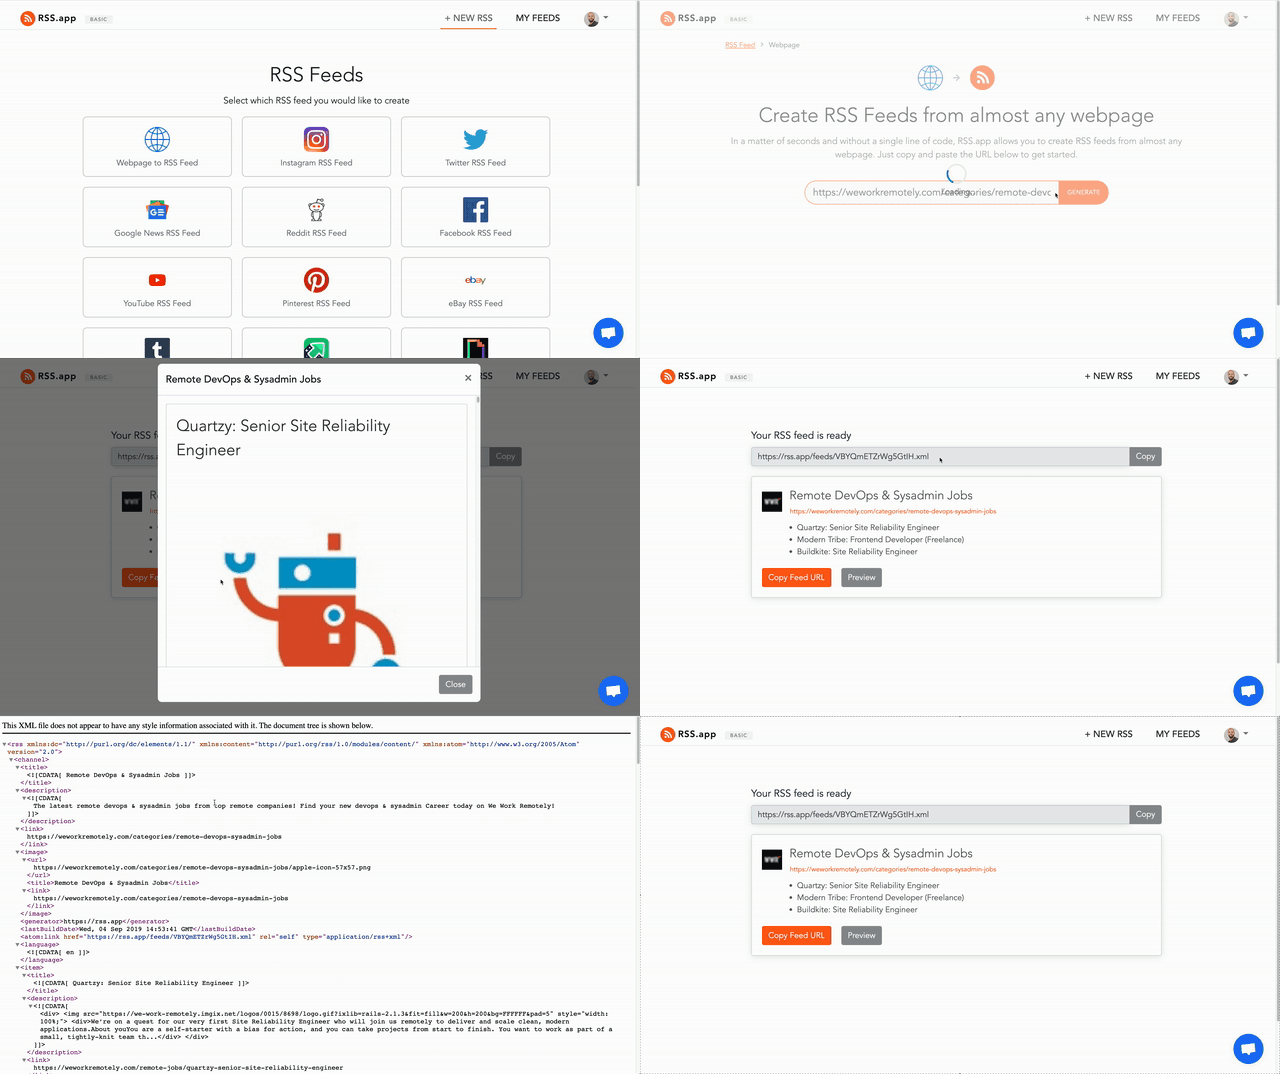
There you have it! You now have a structured representation of the website with new job listings being represented as new RSS feed events. Let’s move on to the next bit of magic!
Prepare your Airtable base
In our particular case, the data we get from the RSS feed generator is the following:
- URL
- Job Title
- Job Description
- Pub Date
- Location (sometimes)
- Company (sometimes)
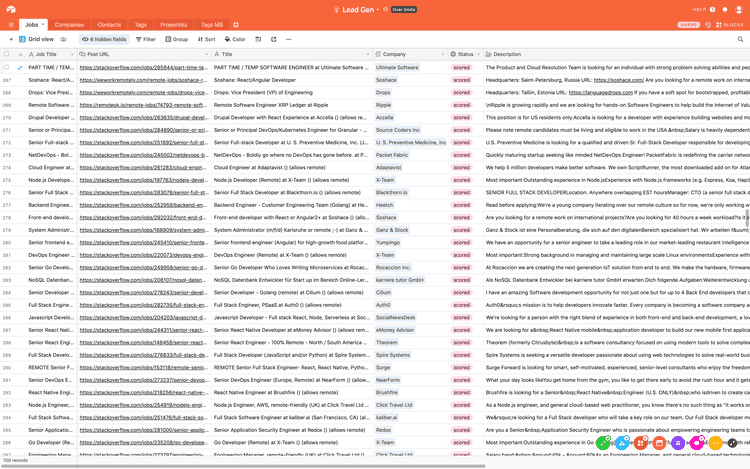
That’s going to be enough to build out our database of leads and start feeding them into Airtable. So go to Airtable, create your base and add two new tables: Jobs and Companies. For the Jobs table, we’ll use the above-listed fields. My table looks like this:
A quick note about a possible improvement here: the URL is pretty much guaranteed to be unique, so use the URL as your primary key in the table. I’m using the title, but that’s much less likely to be unique.
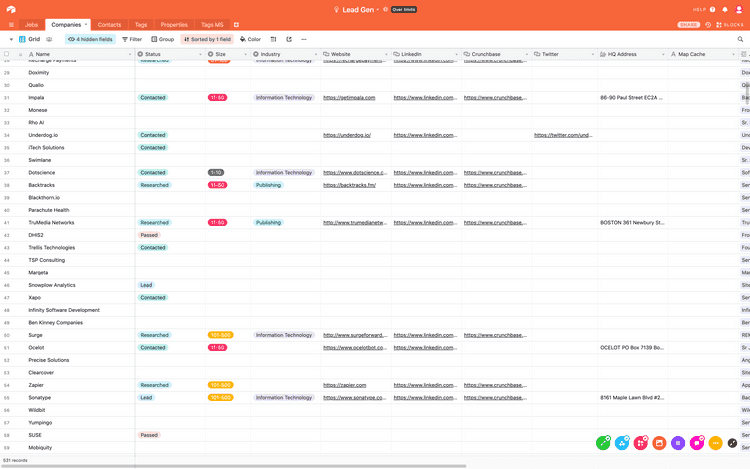
The company table contains a few more fields which I’ve added over time. The “final product” of our labor is a table with detailed company information which we find relevant.
Automate with Zapier
So now that you have your RSS feed, how do you get the data into your Airtable? Well, that’s where Zapier comes in. Zapier allows you to automate everyday business tasks with ease. The basic components of every Zapier task, or Zap as they call it, is a Trigger and an Action.
In this case, our Trigger is the RSS feed and our Action is the Airtable. For a high-level overview of the Airtable integration see the integration documentation for Airtable. I won’t go through the entire setup process, but I’ll show you how one looks like once it’s all set:
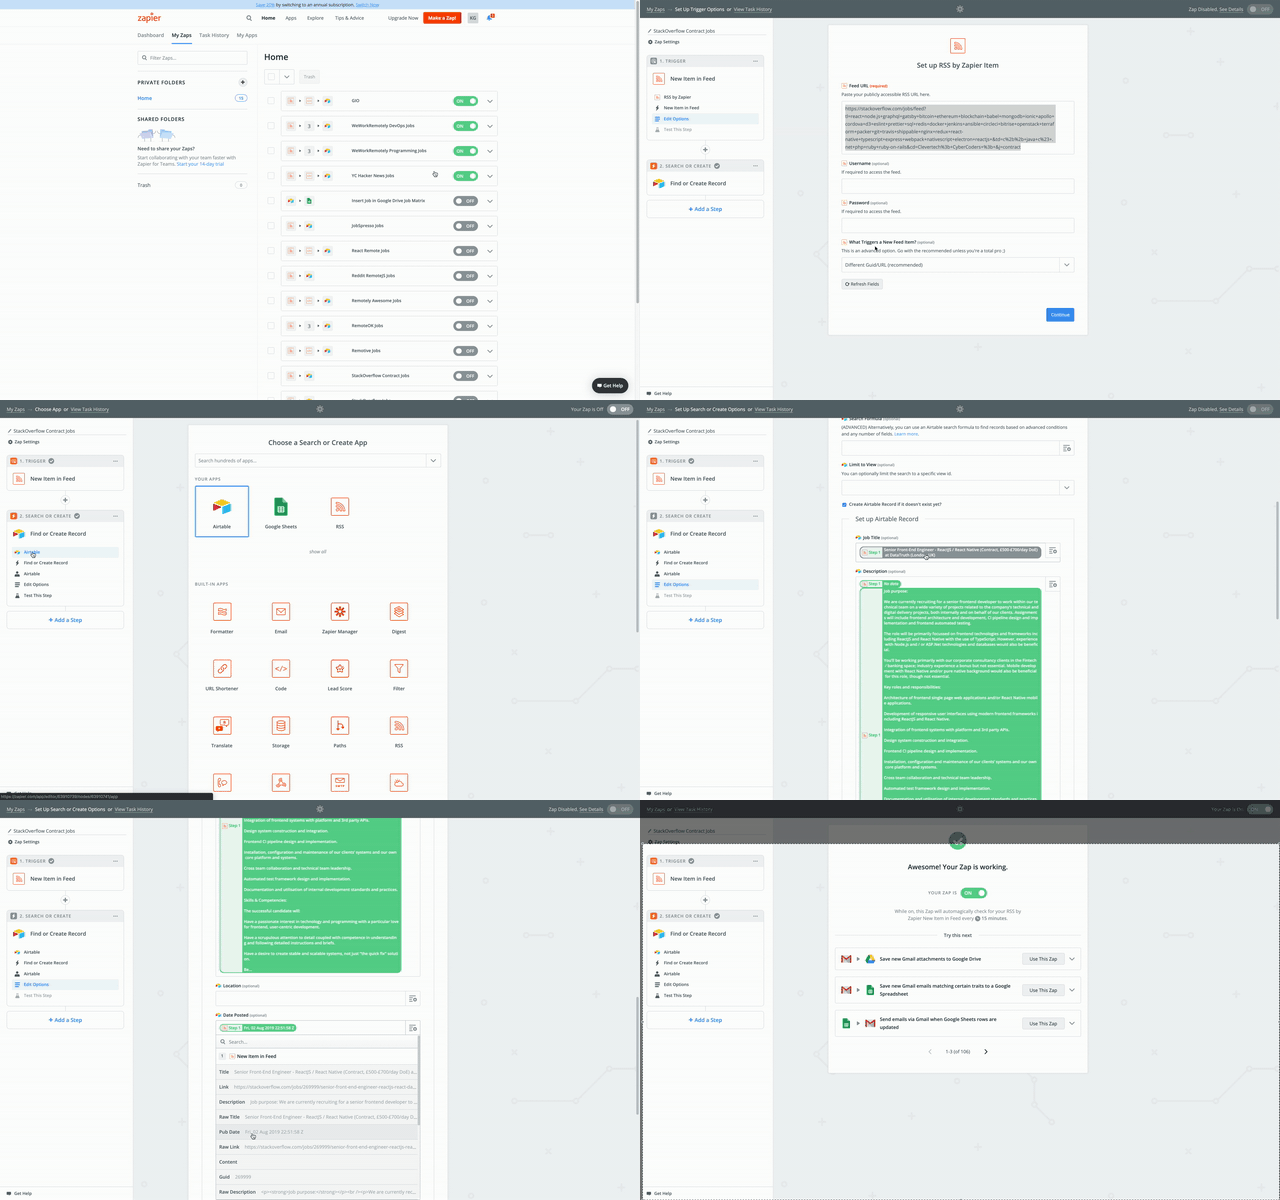
The steps for setting up your trigger are:
- Pick the RSS feed as your Trigger.
- Select the “New Item in Feed” as your trigger option.
- Inspect the RSS feed details collected by Zapier.
- Test: Zapier provides you with several samples, so inspect them and confirm that they contain the information you expect.
The steps for setting up your action are:
- Select Airtable as your Action.
- Use the “Find Record” action. Note that “find” can be used to “create” a record if one is not found. I prefer this over create because it gives me the option to validate that the entry doesn’t exist in our database already.
- Connect your Airtable by supplying your API key (you’ll need to generate an Airtable API key from your Airtable accounts page).
- Select your options:
- Base: mine is the “Lead Gen” base which I created in Airtable.
- Table: Jobs.
- Search Field: search by your primary field (I’m using the Title, but I recommend that you use the URL of the post).
- Search Value: the value you’ll search with from the Trigger result (again, I’m using the title, but I recommend using the URL instead).
- Check the “Create an Airtable Record if it doesn’t exist yet?” checkbox.
- For each Airtable field match the RSS element from the Trigger.
- Test: this step will insert an entry into your Airtable. This is usually the sample that Zapier obtained in step 4 of your Trigger setup.
Well, that’s it. Now comes the final touch.
Turn your airtable into a pipeline of leads
Now that you have your RSS feed generating new leads and Zapier feeding those leads into Airtable, let’s look at how you can make this into an actual sales process. You can make a pipeline for the job posts or for companies, the process is the same. I’ll only do it for the job posts.
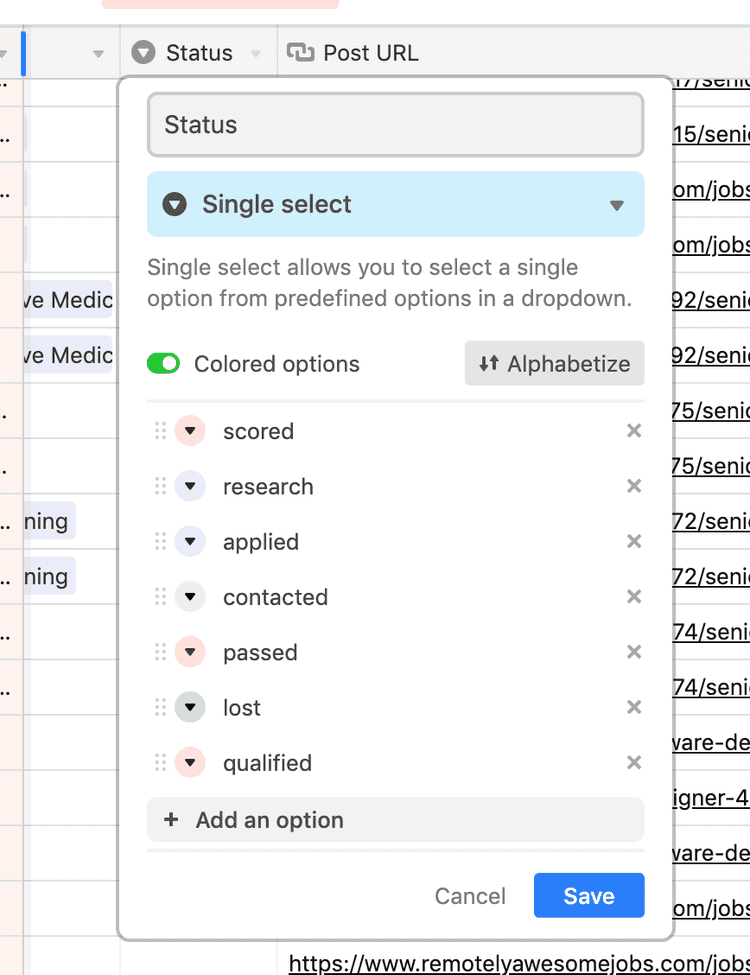
- Add a new “single select” field to your Jobs table called “Status”.
- For the State field, enter several options which represent your pipeline stages.
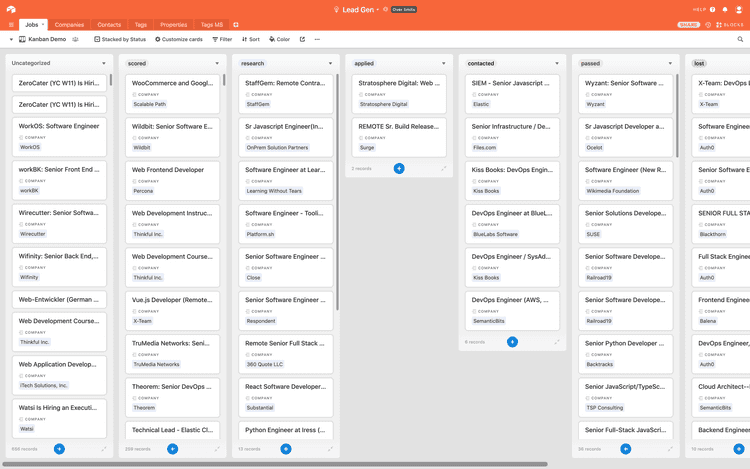
- Click on the view and add a new Kanban view; select Status as your grouping field.
There you have it! Now you can view your lead as a pipeline, which looks something like this:
Of course, you can edit what kind of information your Kanban cards contain and it can be even more useful. Here is ours:
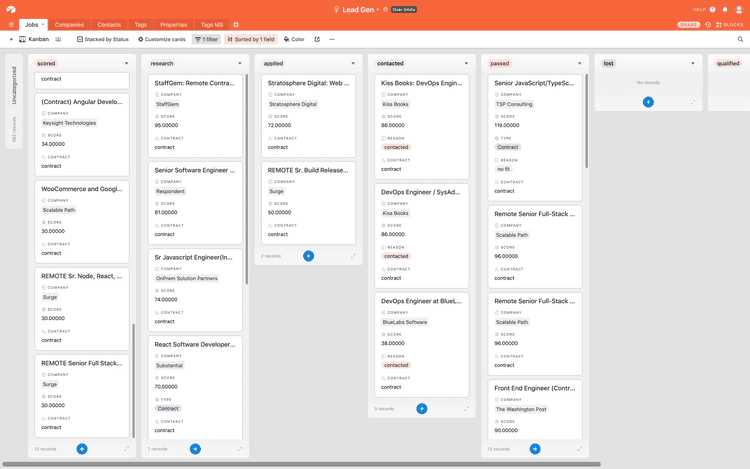
Our database of leads quickly filled up and we had to come up with a scoring mechanism, which ranks the leads based on how well they match our target profile. You’ll notice that in the image above the leads are ordered by their score. That’s very useful for prioritizing which leads to contact first. The scoring is a little more complicated and may require writing a few simple lines of code that can be executed in Zapier. I’ll skip that for now, since our focus here is on the “No Code” aspect of these tools.
Reap the benefits

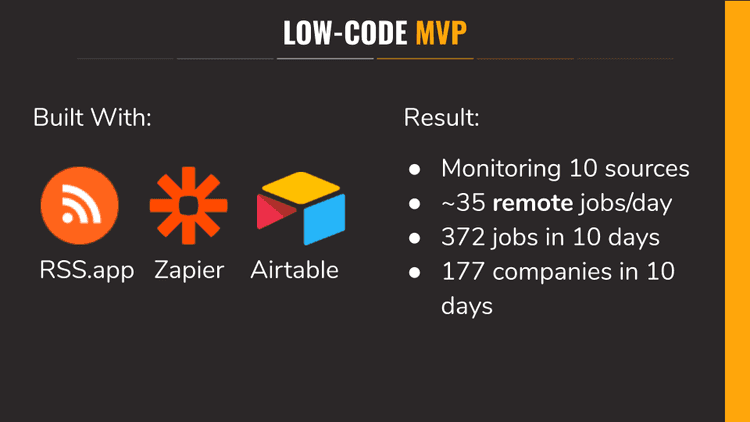
It took me about a week to implement this entire solution and connect 10 different sources of job listings. For the first 10 days, we managed to get over 370 job listings and 177 companies. That increased to around 1500 job listings and 500 companies within the first month. The fast growth of the database has caused us to hit the Airtable limit for free usage. You may have noticed the “Over limits” warning on some of the screenshots. But upgrading to a paid plan is still cheaper than developing a crawler from scratch. Even as an elite team of software craftsmen, we’re still very cognizant of the cost of development. This is something we often try to communicate with our clients:
Software development is very expensive. Be agile - build it in small iterative steps and make sure it is the best solution for the right problem.
It’s clear that today’s tools are becoming very powerful and you can now extract leads from many websites with minimal coding skills.

